You can hire a stager if your goal is to sell your home. These people can give your home an extra boost in the marketplace, and will help you get your home ready for market. Costs for hiring a stager depend on how big or small your home is. Professional stagers will ensure your home looks its best by purchasing high quality soft goods in advance. This includes furniture, art, accessories, and more.
Emily is an experienced home stylist.
As an interior designer with over 20 years of experience in the Charleston area, Emily is well-equipped to know how to dress up homes to maximize their appeal. She is an expert in both business and creative vision. Emily's services extend beyond home staging. She has experience in short-term rental, design, and other areas. She has helped both buyers and sellers to sell hundreds of homes.
Not only should a home stager be able display before-and after photographs, but they must also be able describe their staging process to prospective buyers. Look elsewhere if the stager can't show examples of how she solved problems in other houses. Ask for testimonials from clients and don’t be afraid of asking questions. Some stagers can offer special discounts for customers or prefer vendors. They can also recommend a handyman, house painter, electrician, or other professionals who can help make your home look beautiful.

Prices vary depending upon size, location, price and type of home
Costs for building a home vary depending on the size of the property, its location and the quality of construction. On average, a three-bedroom home costs between $248,000 and $310,000. A two-bed home on the other hand will cost between $93,000 and $150,000. The cost of a home will depend on its size, location and number of bedrooms.
A three-bedroom home will typically cost $300,000 to $600,000, with an average square footage of 3,000 square feet. Budget-minded buyers can sacrifice certain amenities in exchange for more square footage, and then add additional amenities as they need. On the other hand, those with a half-million-dollar budget can build a four-bedroom luxury home with 4,000 square feet. You may be able to deduct the cost of tearing down your property.
Professional stagers invest in quality soft goods upfront
Professional stagers will save you lots of money by investing upfront in high-quality soft goods. It is likely to be more expensive if you rent the furniture directly from the furniture rental company. Professional stagers are known for investing in high quality furniture and other decor. A professional stager is a great option if you need to quickly sell your home. Home stagers charge $250-$3000 depending on what they offer.
A home stager can add a personal touch to a property, allowing for an emotional connection between a buyer and the property. A poorly staged house will make it feel smaller, less welcoming, and more difficult to sell. A professionally staged home will create focal points throughout and provide a welcoming atmosphere. It will also make a house stand out from the rest, attracting the buyers.
Tips to hire a stager
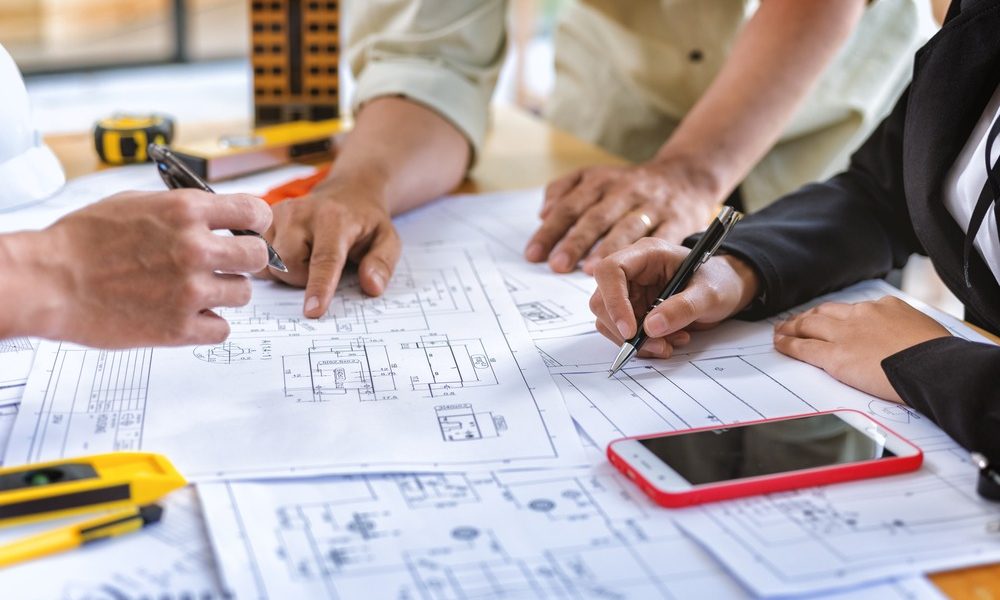
A stager may be a good option to improve your home. It is important to choose the right person for the job. First, make sure they have a portfolio. You want to see pictures that show their work and are coherent. A stager should not use photos taken from another professional. You should also ensure that they are able to explain the thought behind each photo.
It is also important to establish a time frame for the job. Home staging is not a quick fix solution. Additionally, staging is a time-consuming and costly process. Before hiring a stager, you need to evaluate your budget. Before deciding to hire a stager, schedule a home inspection. Fix any major problems in the home, including outdated furniture, before hiring the stagers. Stagers are often hired by desperate home sellers after months of listing and a market that has declined or stagnated. It is also ideal to work with a stager in advance, before listing the home, so that you can have the home ready for its first showing.
FAQ
How long does it take a handyman to finish a project?
It depends on the project's size. The size of the project will determine how long it takes. Larger projects may take more time. However, no matter the project's size, a handyman usually finishes within one week.
Are there any tips from a handyman about how to improve my home and make it more beautiful?
Absolutely! True, a handyman can be trained in any area of home repair or maintenance. He or she knows what needs to be fixed and what doesn't. Don't be afraid to ask for help whenever you need it.
How often should I employ a handyman to help me?
It depends on the nature of your project. You might only need one handyman per work week if your job is a simple fix-it, such as changing a light bulb. You might have to call several handymen if the job involves a lot more remodeling.
What are the most frequent handyman repairs that you need to make?
Handymen commonly repair damaged roofs, windows, doors, gutters, siding, decks, fences, sheds, hot water heaters, air conditioning units, and electrical systems. When it comes to building or home improvement projects that cannot be performed by DIY homeowners, handymen can help with carpentry, plumbing, painting, drywall installation, landscaping, concrete work, fence construction, decking, tiling, and more.
What can a handyman do to fix my leaky faucets
While a handyman is capable of handling minor repairs, they will not be qualified to do major projects like wiring up a house or installing custom-made cabinets. There are many things a handyman could do for minor home improvements.
What qualifications are needed to be a handyman
You will need patience to be a handyman. Also, experience with working with electrical systems, carpentry skills and plumbing knowledge is essential.
You will find that there are many jobs available for those who are qualified, but if you don't know what they are, then you may not qualify.
You might want to consider getting training from a school specializing in these courses.
Statistics
- “Before the pandemic, 40% of people asked how we could estimate a job when we weren't there,” Rose recalled. (inquirer.com)
- With a strong housing market, the handyman and general maintenance worker industry are expected to grow by nearly 10% in the next decade. (housecallpro.com)
- Our handyman services for seniors are provided by professional senior helpers who have been serving the community for over 20 years with 98% customer satisfaction. (cantatahomeservices.org)
- More than 20% of homes in America have outdoor living spaces, including decks and patios. (mrhandyman.com)
- “Once the pandemic hit, that number fell to about 20%.” (inquirer.com)
External Links
How To
How to Install Receptacle Box
It is important to follow the recommendations of your local inspector when installing any type electric outlet. This includes ensuring the correct installation and that there is no water damage or fire hazard.
The majority of boxes come prewired, with four wires coming out of the breaker panel. The two black wires run through the box to the first screw on one side, while the red and white wires go to the second screw on the opposite side of the box. When connecting wires, it is important that you don't use wire nuts or wrap around screws. If this happens, you will probably have trouble getting the wires to stay in place after they are tightened down. These wires should be free to move, but not tight enough to cause them to pull out of the holes.
A second piece of hardware might be required if you wish to add a receptacle or container to an existing box. You'll need to take off the top of your existing metal box, and then add a cover plate. After you have made the hole for your new receptacle, and attached the coverplate, you will need to connect all wires to your new receptacle.
A modern light switch can replace the existing receptacles within your home. This task may be possible without the assistance of a licensed electrician. The first thing you will need to do is remove the old switch from its mounting location. You should then disconnect all wires from the switch. These wires include those that supply electricity to lights and power going into the switch. After everything has been disconnected, it's time to begin the procedure of replacement.
Once you have removed the old switch, measure the distance between wall studs and mark it with a permanent marker. After measuring the distance between the wall studs, mark them with a permanent marker. Depending on where the switch will be installed, either drill a hole or attach it to the wall with drywall anchors.
Once measurements have been taken, and the locations are marked up you can start the job. You will need to remove the drywall from the area where the switch will go. To ensure that the cable is not accidentally cut inside the wall, you should leave about 8 inches space between each stud. Next, attach the mounting brackets to the new switch. Attach the cables to your switch and then secure it onto the mounting plates. Once the switch has been fully installed, you will need to turn the power back on and test the newly added device to ensure it works properly.